Showing posts with label Home Depot. Show all posts

Thursday, August 7, 2014

Master Closet Organization {Before & After}

When we moved into our home a few years ago I fell in love with the open floor plan, the four spacious bedrooms and the high ceilings. The one thing I was not too happy about was having to downsize our master closet. To some of you, you might think it is a great walk-in closet! To others you will see what I mean by a small closet. It is all about perspective...isn't it?

Well after five years I finally feel like we have used the space in this closet wisely. We went vertical with the storage which has given us ample space for our clothes. We still don't have a place for our dresses and suits, so they stay put in the guest closet. I figured since we don't wear those items all that much, is was okay they weren't joining the rest of our clothes. We both have dressers as well for our T-shirts, shorts, workout clothes and PJs.


I would have loved to get a whole closet makeover with EasyClosets or the Elfa Closet solutions at The Container Store, but it wasn't in our budget. So instead I am going to share with you how I created an organized closet using a few easy solutions and products.

First I can't share my solutions without showing you where we were a few short months ago.

(Yes, I am hanging my head in shame at the moment) We would literally just throw our clothes on top of the shelves and run! I hated this closet and I am sure my husband was sick of me saying so. 
And now the pretty picture.....


This is a "walk-in" closet, but on the left side of the closet is a full window. This leaves two very small walls for clothes. And if you remember there was a little nook to the right where we added some vertical shelves for my shoes. Definitely one of my favorite things about this closet now!


The other major solution for this closet were the cube shelves. We really needed something to organize all of our sweaters, jeans, etc. I found these shelves at Target and they fit perfectly with even a little space on top for hats and purses. 


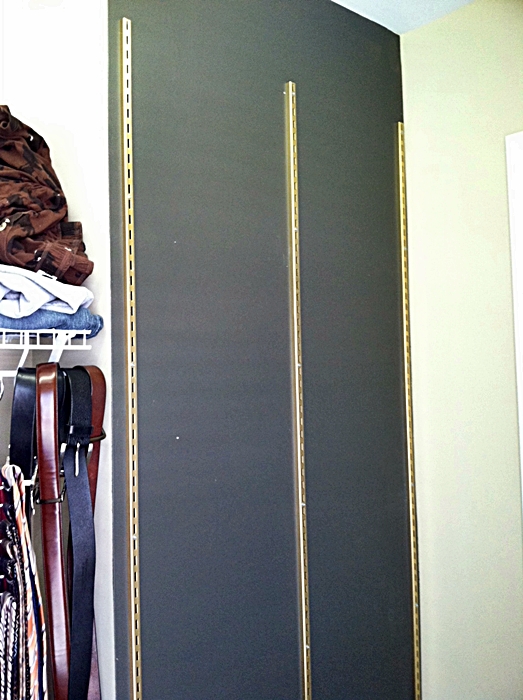
You can see I even added a little gold touch mimicking a campaign style with washi tape. I just had to make it a bit more exciting!

The hanging rod below my clothes was another necessity when it came to our dress pant situation. I found this closet rod at The Container Store. It is adjustable and fits perfectly in the lower corner of the closet. It really expanded our hanging space without having to add a permanent lower rod. 

See Two-Toned Ikea Dresser Hack HERE


We also made use of the space behind the door by adding some hooks for hanging my bags and an outfit inspiration board. I also added some 3M hooks on the back of the door for the Hubs baseball caps. 


I am also in love with my new wooden hangers! I found a box of 24 for $12.99 at target! They add a bit of texture to the space and bring that cohesive feel to the closet. I also used them in my coat closet makeover. Can't say enough amazing things about them. Gone are the days of plastic hangers for me!


I am so very happy with how it turned out. It might not be the biggest closet, but it now has big function! I am not scared to walk in my closet anymore!

How about you? What have you been organizing on a budget lately?

Related Projects:
DIY Home Depot Shoe Shelves
DIY Tufted Striped Ottoman
Outfit Pinspiration Board
Two-toned Ikea Hack Dresser


Wednesday, August 21, 2013

{DIY} Home Depot Shelves Turned Shoe Organization

If you have been following Eat.Sleep.Decorate a while you know that I have had many house goals for 2013. I am slowly chipping away at each space and today I get to share a BIG project that was accomplished over the past couple of weeks.

One house goal was to make our master closet a little more efficient for me and the Hubs. Our closet isn't very big and I may or may not be a clothes/shoe hoarder. I have already tackled the hooks to organize all my bags, created a pinspiration board for clothing options and recovered a tufted ottoman to add a little fun in the closet.

Today I am going to share how Home Depot has changed my life (in the closet) by helping me organize all my shoes!

Here is a little before picture of what our closet looked like:


Ya know...not awful, but not great at all. You can see that I tried to organize my shoes using those cheap shoe organizers from Target. They just didn't work for me.

Do you see where my boots are to the right?? Well I had a space that was 12 inches deep, 31 inches wide and 96 inches tall. I knew I needed to use this space more efficiently and that is when Home Depot came to my rescue......


Can you hear the Angels going "Ahhh...."? Well I did!


I grabbed my measuring tape and decided to get 6 shelves, 3 tracks and 18 brackets. Then I ran home..well actually I drove, in my car..as fast as I could!


I cleared out that little nook where the shoe rack had been and began taping off the trim for a little fun paint. I can never leave well enough alone can I!? But I am loving the back drop to my shelves. Urban Bronze by Sherwin Williams baby!


I then decided that I needed even more bling and began spray painting all of the tracks and brackets Metallic Gold! 


Can I tell you how much I love my new Rustoleum Comfort Grip Sprayer! It saves your index finger from exhaustion and really helps create smooth lines. If you don't have one and you are a DIYer...it is a MUST! Not sure how I have been living without it all these years. Seriously!


Anyhoo..back to our project. Once all of the tracks were dry I started installing them using my drill and my muscles! HA!


Not too shabby! Then I started adding the brackets and shelves...


Totally Crushing on the gold details!!


After putting the shelves up I decided that they hung over just a little too far. Just about 3 inches too far. I was afraid that we might bump into them and then all of my shoes would go flying...which would equal no good.


So my dad helped me by measuring the three inches and using a level to make a straight line across the board. I was not going to go near the electric saw, so my dad came to the rescue of cutting all six boards for me. (I know I need to learn for myself one day!)


I took these babies home and sanded down the ends and placed them back up on their brackets.

THEN..came the fun part! Styling the shelves with my shoe collection!


As you can see we started the track and first shelf about 2 feet up so I could have room for my tall boots. Also, the top shelves that will be hard for me to reach ( I am 5'1") are shoes that aren't used all that much. I figured I could rotate the shoes based on the seasons as well! I also have so much room that I could add a few more shelves and actually store the Hubs shoes on there too. 
(We will see about that...how about just more shoes for me!...kidding/not kidding)


I also saved some major space by adding this little basket for all of my flip flops and thong sandals. 


I am In Love!!


This closet is still not Perfect, but SOOO much better already! Next task is to organize the clothes on the top shelf! I have an idea..so stay tuned.


What do you all think? Could you tackle a weekend project like this?

Thank you to The Home Depot for having amazing supplies and employees who are helpful!

Linked up at: We Heart Organizing & Thrifty Decor Chick

Monday, August 19, 2013

Industrial Lighting for Less

Hello There! Welcome to a new week! Can't believe it is Monday already....summer is flying by.


Last week I received a call from a friend that was in the market for some industrial lighting for her bedroom. She wanted two bedside table lamps that weren't outrageously priced. As we all know, lighting is expensive. Lighting is the one thing that you can really splurge on. It can change the look of each room in your home. That being said....you can find lighting that looks high end but serves the same function for less!


Take a look at the brass apothecary table lamp. I love the look of the brass throughout this room. It adds a little history to the space without making it feel antique and outdated. 


I also love the look of these swing arm bedside lamps. If you live in an apartment or have a really small bedroom where you need your bedside table for storage, these would be a great alternative. 

Let's take a look at where you can find these amazing Industrial lamps for under $100. 

One: This is a more modern take on the apothecary lamp. It would be a neat addition to even an office to give it a bit of glam. I also love how the lamp has a plug built right in for charging a cell phone or alarm clock.

Two: This lamp originally caught my eye because of the price. It is only $35.00 at The Home Depot. My friend really wanted a brass or shiny gold lamp, but for this unbelievable price...if you are a DIYer, you could buy a can of metallic spray paint for $3.00 and you still have an amazing lamp for an amazing price!

Three: Can you ever go wrong with items from World Market? This lamp has more of an upright feel, but still gives them same look. 

Four: I believe this beauty is the one my friend went with for her bedroom. This table lamp has so many color options that you could have one for each room in your home!

Five: Okay...I may have broke the $100 rule on this one, but I couldn't help it. I really like the idea of a swing arm lamp that hangs from the wall. You still get the same look, but these lamps help keep your bedside tables clear and allow more room for books and pretty items.


Would you consider putting these pretties in your home? How do you feel about splurging on lighting for your space?

Have a Marvelous week my friends!


Thursday, August 8, 2013

{DIY} White Board for the Office

I know I have been teasing you all about the Hubs office makeover over the past few months. It really is complete, but I just need to make the time to stage and shoot some photos. I apologize for not getting around to that. It has been a busy summer and the Hubs works from his office most days, so it is hard to get in there and do my thing. Hopefully soon!

However, I do have a little DIY for you all today on how we hung his beautiful (and cheap) whiteboard!


So a few months ago I started searching for large whiteboards that the Hubs could use in his office. He is an investor and wanted a place to write his ideas and goals and be able to see them by just looking up from his desk. I searched office supply stores, but for the size we wanted it was going to be around $100-$150!! I thought that was a lot of money for a board that has special white paint on it.

Then a couple of weeks later I was at one of my favorite stores (Home Depot) and ran across their large sheets of marker board. It was only $14.99 for an 4'x8'!! I was so excited that I sped home to measure the wall where it was suppose to go. We didn't have a long enough space to be able to use up the 8' so I decided to keep the length at 56" to be safe. I flew back to HD and a wonderful lumber specialist helped me cut it for free! 

I also picked up these mirror brackets to hold the mirror in place. ($3.99 x2). 
Total project thus far..$22.97!


My dad came over to help me hang the clips. We decided we would need four on the top and four on the bottom so the board wouldn't bow.

Sorry, bad angle! They are measured equal distance and you can see that we did a little opps at first!

We used plastic screw anchors in the wall so the whole board wouldn't pull away from the drywall. 


Then it was time to slide the white board into the clips....


The board was still a little wobbly, so I found some extra circle pads that I used for the bottom of our chair legs in the kitchen. I cut them in half and placed them between the whiteboard and clips. No moving around this time...perfectly in place and ready to be used!


I surprised the Hubs after he got home from a business trip. He was very pumped about his new whiteboard for only $22.97!! Big time savings ya'll!


His desk has even been relocated to facing the whiteboard. I think he likes it a whole lot!


Because I didn't add any trim or bottom tray for the markers and erasers to rest, I found these little tin pails in the dollar section at target! I added a 3M hook and presto....I couldn't be happier with the little organization station.


What a simple and cheap project! You could even use this idea in a command center, kids room or entryway for family organization. I have seen many neat projects with marker board all around pinterest.

Thanks to Home Depot for making this DIY possible and right on track with our budget!

Happy DIYing All!

Linked up: Liz Marie Blog & Serenity Now
Related Posts Plugin for WordPress, Blogger...

Total Pageviews