Wednesday, January 28, 2015

Reader's Design Dilemma {Exterior Paint Choices}

Last week I was contacted by one of my reader's. I love getting an email that has some sort of design question or dilemma. In this case Denise was having difficulty choosing an exterior paint color for her home:

Amy, I think your so talented. I was hoping you might give me a minute or two of your valuable time. I have re-sided my home and the painters are standing by while I stand dumbfounded at the chip wall, I have no idea!

I need to co-ordinate my roofs green and blue grays and I'd like the new shake to stand out a bit but have no idea about the trim, body door and shutters. I saw the colors on your latest flip and thought they were so gorgeous I'd take a chance to see if you had an idea about the direction I so go.
Thanks in advance, and thanks even if your too busy to write back. I love your blog and all the inspiration we get from it.

Denise

photos - 1) house, 2) roof, 3) shake, and 4) new window trim
I've added staggered shake to the gable and will be adding this window detail and beefier posts


What an adorable home! I was pleased to hear that she is going to be adding some larger posts to the front porch as well as beefing up the trim around the windows and doors. This will make a huge difference for the curb appeal of this home. 

I sent Denise three options (although I could have sent her like 10!). I am anxious to see what she decides and hope that she will send all of us some updates along the way. 

Option 1:

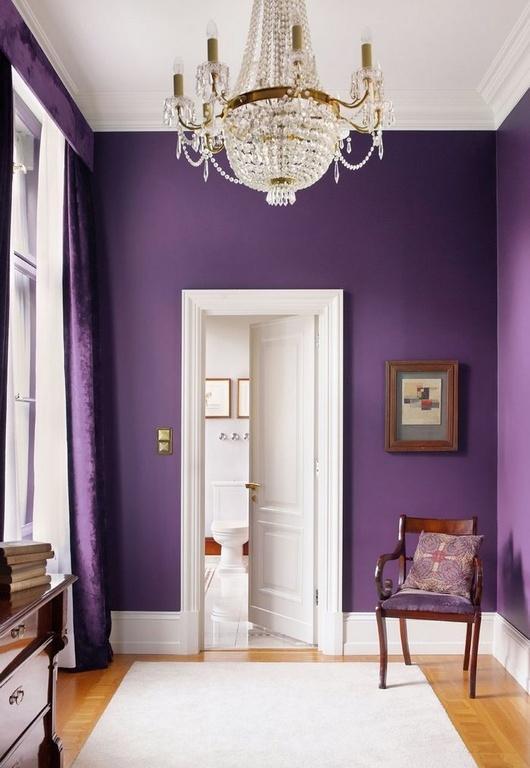
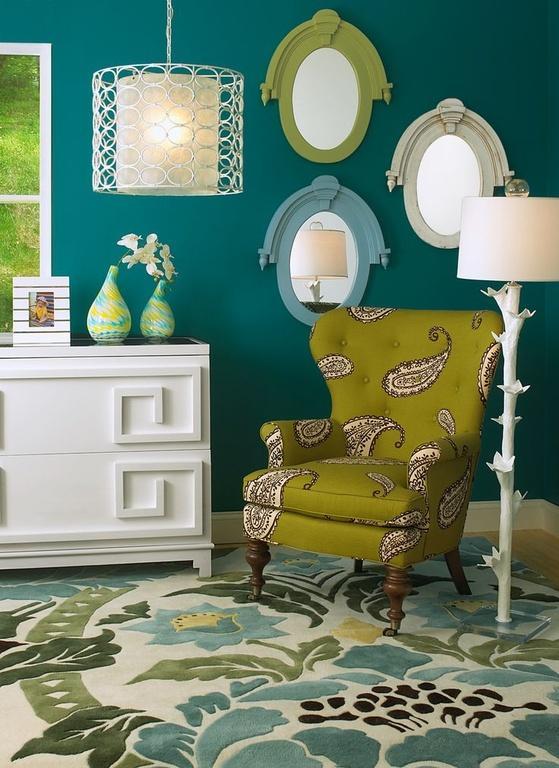
Since the roof has a fleck of green to it, I thought Crownsville Gray would be a great compliment. It also has hints of green, brown and gray. The posts and trim would really stand out with Simply White and be such a fabulous contrast to the darker siding. And I just thought she needed a Navy blue door. You know my love for the dark regal blues

Here is a little idea of where this color scheme is headed:


Option 2:


We have actually used this color combination in a couple of our flip homes. These colors feel a bit fresh and cottage like to me. The door color would really stand out from the street and adding Chelsea gray to the shakes would create another element to the curb appeal.

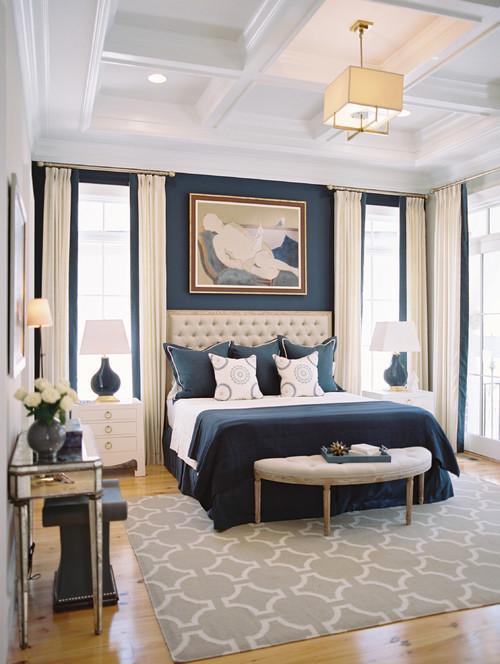
Here is an example minus the front door color. This was a flip we did a couple of years ago and used Sandy Hook as the main color, Chelsea Gray on the shutters and Glass of Milk as the trim. 


Option 3: 


This color palette was pulled from one of the blogs that I currently follow. The color combination is a bit lighter than the previous two, but still plays on the green shingles making it feel cohesive. I also love the idea of adding a little color to the porch ceiling. Very cottage like indeed!

Here is the example of Dixie Delight's home painted in this color palette:


Thanks Denise for sharing your home with us today! In my opinion, Denise can't go wrong with any of these paint choices. 
Tell me....What option is your favorite?


If you have a design question or are stumped on how to organize a certain space...email me at: eatsleepdecorate(at)gmail(dot)com. I would love to help you with your design dilemma's!

Monday, January 26, 2015

My Top {5} Spaces That Have Stayed Organized

Well hello and welcome to a new week! I hope you are all staying safe and warm as storms roll through the Northeast. Thinking of all of you Northerner's today!

I am now in nesting mode. I have been cleaning closets, the garage and organizing piles. All of this organizing has got me thinking about the spaces in my home that I really don't have to touch. The "Organized" spaces, the ones that have pretty much stayed organized from the time I bought some baskets or slapped on some labels.


I wanted to share with you my top 5 spaces that have stayed organized over the past couple of years and a few tips and tricks that have helped keep those spaces looking great!

1. Master Closet: For the most part this closet stays the way it looks in the picture below. There are days of tantrums when I can't find anything to wear and the clothes hit the floor, but most of the time everything has its place and stays organized. The cubby shelves above the hanging clothes have really helped with that. There use to be piles of clothes that would fall on us! I am also in love with my shoe organization. Those Home Depot shelves were the best thing I added to the closet! I have also enjoyed having the ikea dresser in this space to house my unmentionables :) This little walk-in closet has really helped us keep only clothes that we will wear over and over. We have a box in the corner (which you can't see) that is designated for donating. When we no longer wear a certain shirt or pair of pants for a year....it is time to donate! This helps cut down on the amount of clothing in this tiny closet.


2. Organized Media: Two years ago I was on a organizing rampage. One of the first spaces I tackled was our media storage. The cases to the DVD's just took up way to much space. So I decided to take them out of their cases and organize them A-Z. I found the plastic DVD sleeves and media box at target. You can see more of the details Here. It was a pain, but so worth it. Now these are stored in our new TV dresser in the living room. They don't take up too much space and I can actually find a movie I want...while singing the ABC's of course.


3. Laundry Closet: I can't believe that this picture below is still the Number One pinned picture on my blog to date. Who knew that taking a Saturday to organize my laundry closet would go viral? This space has stayed organized thanks to bins, baskets and labels! I can't say anymore good things about these plastic woven baskets from Target. They are great for cleaners and detergent because they can be wiped down if messes arise. These Free printable labels have been a time saver too! Now the Hubs knows where everything is suppose to be put away and I don't have to hear him ask me Where is.....? I can't find it? HA!
I laminated those labels with 3M Laminating pouches. They come in many sizes OR you could just use some contact paper to add a bit of thickness to your labels. You can see my ugly before Here.


4. Master Bathroom Vanity Organizing: The key for keeping our vanity organized were these wonderful drawer containers that snap together. Each drawer has a different configuration based on the contents. You can find these at Target or The Container Store. Everything has its place and that makes me very happy!
I have also kept our counter top pretty organized by corralling my everyday facial products with a thrift store tray. I have also placed a small bowl on the tray for jewelry. A little vase with decorative stones displays my makeup brushes. This helps with getting ready in the morning as well. Everything is at an arms length.


5. Under the Kitchen Sink: This is one place that I had a really hard time keeping organized. Cleaners and just plain ole "stuff" would get shoved in this black hole and never again come out! A couple of plastic bins, a small round lazy susan and extension rod did the trick. Now my most frequent used cleaners are hanging on the rod ready for immediate use. The Lazy Susan helps me see all the products without digging far in the back of the cabinet. These plastic bins are perfect for housing cleaning products and are easy to wipe after a spill.


Most of these organization ideas are easy and cheap! All you need is to take a little time going through each space and make it more useful for you and your family.

Now....ahem.... there are a few areas of our home that WERE organized and have no longer stayed that way. Like my Pantry and my linen closet. Those two areas are in need of another purge and organizational session. Will show you those scary spaces soon! Do you have any tricks for me on how to keep your linen closet organized? Help!

Have a wonderful start to your week my friends!

Friday, January 23, 2015

Fabulous Feature Friday: House Seven Blog

I haven't posted a Friday Feature in a while and I really want to bring this back! I love finding new to me blogs and sharing some amazing talent with all of you.
I recently came across House Seven Blog on Instagram. She posts the most amazing snippets of her home, so I decided to check out her blog. Well...it is just as lovely. Anissa shares projects around her home as well as everyday life. I am excited to share her beautiful home with you today. Enjoy!


I just adore her Industrial Cottage Chic place! It started out as just a builder grade home and Anissa has added so much character to each space she touches. I love how she has combined vintage pieces as well as more modern pieces in each room. Love her style don't you?

Hope you lovelies have a wonderful weekend. We are tackling a few items on the nesting list! Wish the Hubs good luck! xoxo


Thursday, January 22, 2015

I've got the Blues....

No I am not down in the dumps, but I've been really crushing on dark navy/indigo blue lately. Do you ever come across a color that excites you? I have never really been into lighter shades of blue, but dark-dramatic blue is where it's at (in my opinion).
Whether you use the color on a wall, in a pillow or to add a pop of color to your bathroom vanity...I think it can be both classy and modern. Use some navy paint against white molding and boy the contrast is fabulous!
See for yourself.....


Are you a fan of dark blue/indigo tones? Where could you see this color used within your own home?


Some of my favorite Dark Blue Paint Colors:
Naval by Sherwin Williams: SW 6244
Hale Navy by Benjamin Moore: HC-154
Gravel Gray by Benjamin Moore: 2127-30
Newburyport Blue by Benjamin Moore: HC-155
Polo Blue by Benjamin Moore: 2062-10
Midnight Navy by Benjamin Moore: 2067-10


Tuesday, January 20, 2015

A Plan {Our Twin Nursery}

I will be 25 weeks pregnant tomorrow! Yahoo! Getting closer to meeting my babies. While counting down the days gets me excited, I am also a bit anxious when I think about getting everything done before their arrival. Especially because twins are known to come early. Yikes!
So we have been in the works cleaning, purging, organizing...you know, full nesting mode! I think I am wearing John down already and little does he know we still have so much left to do. Buckle up Hubs!


A while back I shared with you the previous floor plan of our tiny nursery. It was used for an extra guest room. Well at only 11'x10' we have had to be very creative when trying to fit TWO cribs, a dresser, glider and storage into this precious space.

Here is the layout we are hoping for:


It will be a bit cramped, but the sweet babies aren't going to care! We have really tried to create as much storage as possible with slide out drawers under the cribs, a six drawer dresser and two hanging bars for clothes in the closet. We are also re-doing one of our downstairs utility closets to create more storage for the big stuff that babies need like bouncers, bumbos, playmats, etc.

I want this room to feel calming with just little touches of color here and there. The walls are painted Shoji White by Sherwin Williams and the ceiling is Amazing Gray by Sherwin Williams. I really love the color palette that is going on so far!


Here are my design plans for the Twin's Neutral Nursery:


1. Round Mirror- I love this one, but have found a much cheaper version at Ikea that I think I am going to go with. There is so much white in the room that I wanted to add touches of gold to make the room feel a bit more sophisticated and put together.
2. Yellow Lamp- I needed a little pop of color and found a similar lamp at HomeGoods a while back. Its quite adorable.
3. Etsy Artwork- I love the balloons over the city as well as the merry-go round in Paris for a bit of whimsy.
4. Mid Century Dresser- I found an almost identical dresser to the West Elm one at a local antique/consignment shop. It is perfect and I can't wait to get it into the space!
5.Naps Fix Everything- Again I love supporting small business and Etsy is a great place to find artwork.
6. Floor Lamp- I am thinking that since I don't have a lot of room for a side table next to the glider, that I am in need of a floor lamp to give me the space I need.
7. Side Table- this Nate Berkus table just took to our local Target stores and I am thinking this is just what I need next to the glider.
8. Glider/Rocker- this glider is almost identical to one I found for around $200 at HomeGoods a couple of months ago. Such a steal and so so comfortable.
9. Pouf- I am in need of a pouf or ottoman to place my feet while rocking and feeding. I liked the pattern and colors in the one above. Target to save the day again!
10. Striped Fabric- this striped fabric will be used on the roman shade as well as the crib skirts. You can't go wrong with stripes in any room!


1. Pendant Light Fixture- This light has already been hung and is currently at an amazing price! You can see the lighting details in the nursery here.
2. Floating Shelves- I am so excited about my Lucite shelves that are going to be hung on the wall near the glider to organize books.
3. Color Scheme- These pillows that use to be on the guest bed have become my color inspiration. Yellow, Gray, Navy, Turquoise & a Flamingo Pink!
4. Bright Lab Lights- I love the looks of these string of lights. I think they would add a bit of fun to the room and come in such a variety of colors. This strand has white, gold, pink, coral, indigo and turquoise. I think the colors would be perfect!
5 & 6. Unexpected Artwork- I have been in love with Ricardo Solis art for quite sometime. I am so so excited that these prints should be here sometime later this week. I ordered 11x14 prints for above each crib. Can't wait to share a bit more about this artist in a couple of weeks.
7. Throw Rug- Even though the room has wall to wall carpeting, I am thinking a small rug would add another element to the room. Maybe even a possible sheep hide for near the dresser/changing table.
8. Baby Mod Crib {x2}- I absolutely love these cribs! We have just started setting them up and I dig the low profile and space that they save in our small room. They also have a drawer that pulls out underneath for storage. Perfection! And...can you believe they are from Walmart!?


So what do you think? Even though the room has to be fairly gender neutral since a boy and girl will be sharing the space, I have added some feminine and some masculine touches that I think will be perfect!

If you want to follow along with bits and pieces of the nursery as I add furniture and accessories to the space, head on over to Instagram! I am hoping to be able to share a tour of the room in just a few weeks. Wish me luck!


Thursday, January 15, 2015

Gorgeous Bedrooms with Dark Walls

I am thrilled to have a Guest Designer on Eat.Sleep.Decorate. today! Jane is here to talk about the new trend of going dark with our walls. She gives us some great tips and tricks on how create that dramatic room without having to go over the top dark. Personally I am a big fan of this trend. It seems to create something dramatic yet cozy. Enjoy!

********************************************************************************


Gorgeous Bedrooms with Dark Walls
By Jane Blanchard

Nothing transforms a room faster than changing the paint color. Try something new this season and add some drama to your bedroom with a dark, bold color. Dark colors add spirit, personality, and character to a room and there's nothing more dramatic than dark walls.

Most people think dark walls make a space dreary and depressing and, well, dark, but the truth is that a dark color is just as versatile as a light color. It's all about choosing the right color to define and highlight your room. Forget what you've heard about small spaces needing light colors. Using dark colors can actually make a small room look larger. These following examples show how to use dark colors on your walls to create your perfect bedroom.

These rich walls highlight the chandelier and make this narrow space feel spacious.


Dark colors also make a room feel intimate and cozy, which is a great effect for a bedroom. To keep the room from being too dark, it's important to spread lighting around the room and use accessories that reflect light.


With dark walls, you don't need a lot of other colors or patterns. Dark walls provide the perfect backdrop for incorporating different textures. Add even more dimension using mirrors. This simple room uses a variety of fabric textures on the bedding and window treatments, but a very simple color palette to create an intimate space.


When using a dark color, it's important to create contrast. Using light fabric on furniture and for window treatments will make the room pop. Dark walls can also help tie together different styles of furniture. Choose furniture that is noticeably lighter than the wall to make the room appear brighter.


Dark tones can highlight architectural features and unusual wall shapes. Here the dark walls highlight the moulding and the unusual wall shape. The shape of this room would have been lost with light colored walls. Incorporating the wall color into the bedding creates a balance in the room.


If you are hesitant to paint your walls dark, using a deep neutral tone can be a good compromise. A deep neutral tone can highlight bright colors, which makes your whole space look brighter. If using a saturated color, choose one contrasting accent hue so the room is not overwhelming.


Another solution is to use a dark color on only one wall. One dark wall can make a room seem larger and is a great way to bring some bold color to a space without too much commitment.


For more home inspiration visit Modernize.

************************************************************************************************************

Wow! So much great inspiration. I am personally loving the last picture with the darker blue walls against the beige/linen color. I really do like more of a high contrast rather than having the whole room dark like a cave.

Which one is your favorite? Could you dig creating a dramatic space with dark walls?

Monday, January 12, 2015

{DIY} Fold Over Clutch

Happy Monday! Did this weekend fly by or what? The Hubs and I got some much needed tossing and organizing done. Can you tell I am starting my nesting process? Yep...time to get rid of "stuff"!

Today I wanted to pop in and share a fun DIY that my mother-in law and I made last week while she was visiting. I had a vision in my head for a while and with my mother-in law's sewing talent, we created this easy fold over clutch within a couple of hours.


I love how we added a little unexpected pop of color within the inside...


And of course I had to add a fun gold zipper....


For the Full tutorial on how to make these little leather bottom fold overs, hop on over to my Mother-in law's blog Barbara Huber Designs! Make sure you say hello from Eat.Sleep.Decorate!


Related Posts Plugin for WordPress, Blogger...

Total Pageviews