Showing posts with label Fall Decorating. Show all posts

Monday, October 26, 2015

7 Fall {DIYs & Recipes} I'd Like to Try

Hi all! Hope you are enjoying your fall. The weather is really changing here in NC and I have been in the mood for salted caramel mocha's and pumpkin pie! The fall is definitely one of my favorite seasons.

On my free time (haha) I have been scouring the web and finding some really neat fall DIYs that I would love to try. Not sure I will have time this fall or not, but I am definitely saving these ideas on my Fall pinterest board for next year.

1. DIY Plaid Pumpkin
My girl Courtney is the queen of plaid and she has recently created this adorable plaid pumpkin vase for fall! How adorable is this? Or if you have no use for a vase, you could just create a plain plaid pumpkin and add to your Halloween or Thanksgiving decor.


2. Apple Cider Sidecar Cocktail
Let's be honest, this mama could use a cocktail and this one is calling my name! Might be mixing this sweet drink this coming weekend.


3. Orange Gingerbread Sugar Scrub Cubes
Don't these look fun!? I am thinking I need to call all my girlfriends and have a girls night in just to make these little guys. Maybe a fall party will be in my near future. 


4. Fall Printable (Free Download)
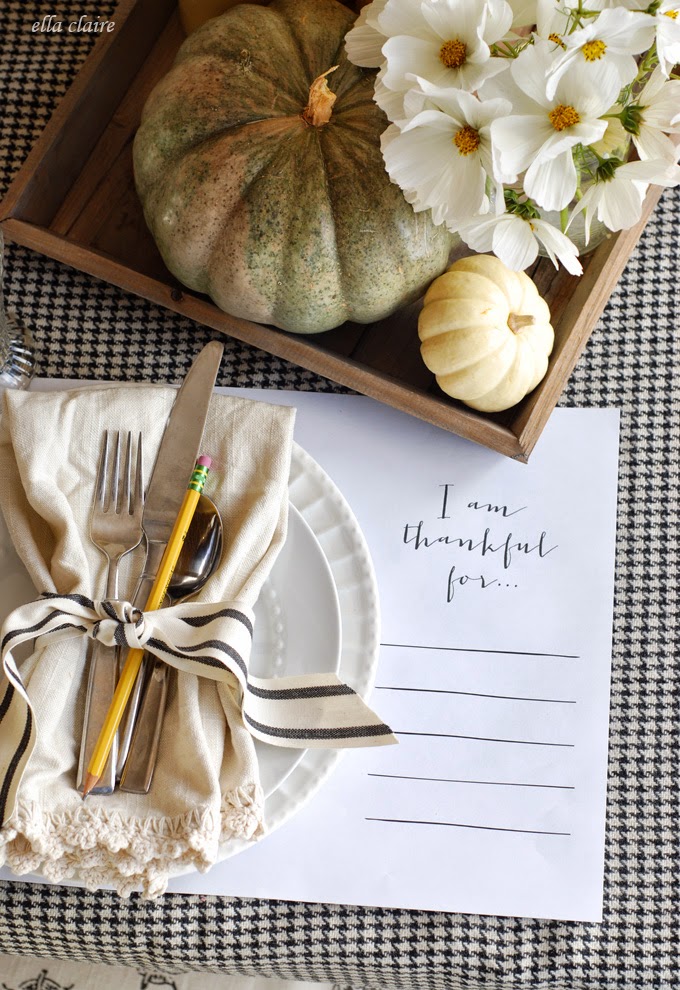
This saying is so me! I love my tea and for some reason the fall makes me want to cozy up and read something new and exciting. This printable also comes in black with white writing for all of you chalkboard lovers.


5. Fall Apple Cheeseballs
How adorable are these? Like so so cute. If you know me at all...anything cheese is perfection!


6. Chocolate Chip Pumpkin Bread
Can you all see a recurring theme around here? Yes I love fall and yes I am hungry! I love this sweet printable recipe card from Jones Design Company. Have you signed up for their free printable archive?


7. Candy Corn Chocolate Bark
Are you a candy corn fan? You are either all in or absolutely hate the candy. There are no gray areas for candy corn. I actually love it until I get sores on my tongue from eating too many...then I despise the stuff! Maybe making them into bark would help me from eating too much (maybe). 


What do you all crave in the fall? Anything I NEED to know about?

Have a wonderful weekend friends! 

Wednesday, October 14, 2015

Easy Pumpkin Decorating {& GIVEAWAY}

Well it's no secret that everything around here has to be quick and easy these days. So when I saw this adorable photo from a blogging friend on Instagram, I had to share it with all of you!

How cute are these gold vinyl dots? And....how seriously chic and easy would these be for your fall decorating?


I also love the idea of the vinyl monogram and how reusing these in different ways around the house would be amazing! 

If you aren't following my sweet friend Leen the Graphics Queen, then you are missing out on some fabulous ideas for your home! I really need this Welcome Sign in my life and how adorable are these stars and dots in this little girls room?

Leen is the women! You can custom order pretty much anything in any color...and she is SO reasonable. 

Are you all ready to win some Gold Dot Decals? Hope So. One of you lucky readers will win a sheet of these different size dots just in time for Fall decorating!


Follow the rafflecopter below. One winner will be announced Monday 10/19 . Good Luck! a Rafflecopter giveaway

Thursday, November 20, 2014

Easy Thanksgiving Tablescapes

If you are anything like me, life can get crazy busy and you forget all the detailed pieces when it comes to entertaining for the holidays. This year we are actually going to be out of town for Thanksgiving, so I didn't have to come up with a tablescape for guests. I am kind of sad about it. I love setting my table and making it pretty. So this year I am living through inspirational pictures like the ones below.

With Thanksgiving only ONE week away, here are a few quick and easy ideas to make your table look festive without much trouble.

Source- BHG

Take a trek into your backyard or neighbors yard. It is amazing what inspiration you can find for a centerpiece. Grab a stem of colorful leaves, a branch of magnolia or a bunch of pinecones. I love the organic feel of bringing the outdoors in! 


Source


Source

Emily created an amazing centerpiece from discounted ornamental Kale from Home Depot and craft paper as the table runner. Genius!


I also love the idea of using what you have in your refrigerator. Grab some colorful fruit to lay on top of garland or tie a sprig of rosemary to a cloth napkin to add interest. 


unknown source

This is a neat idea of gathering branches from outside and spray painting them a bright color. It creates a sort of art piece right on your table!


We can't forget about the kiddos! Did you have a kids table growing up? We sure did!
This idea is absolutely adorable. Grab some brown or white craft paper (or wrapping paper) to cover the kids table. Use jars from around the house for art supplies. This will keep them busy a little longer so you can enjoy your scrumptious meal and the paper helps with clean up. Win Win!


How about spray painting a charger with chalk paint? Rather than a word, you could write the guest's name on the charger with chalk marker to help identify where everyone will sit for the meal. I also like the idea of using ribbon and yarn that you have laying around the house to wrap the cloth napkins and silverware. Nothing fancy, but helps add so much character and texture.


Free Printable
This is a great way to get everyone involved in an activity while waiting for the meal and takes the place of a normal place mat or charger. Click the source link to download your own!


As you can see, it doesn't have to be expensive to look amazing. Using what you have around the house is your best bet before going out to buy something. 

What ideas have inspired you? Any tips and tricks you have used over the years to help with the stress of having company?


Monday, September 1, 2014

Laboring Away Blog Hop {Good-bye Summer..Hello Fall Tablescape}

I hope you all are having a fabulous long weekend. Can you believe that summer is coming to an end? It always seems bittersweet to me. I love summer, but am usually very ready for fall to come. The cooler weather brings color, football, texture, warmth and naps on the couch!

Today, I am honored to be a part of a fun blog hop featuring these amazing ladies:


Each of us are sharing a DIY that we have currently tackled. Make sure to hop on over to each blog for a special DIY as well as lots of inspiration...you won't be disappointed! Sarah from 702 Park Project, Mary from Lemon Grove Blog and Brittany from Brittany French. Some talented ladies!

*********************************************************************************
Today I am sharing a "So Long Summer, Hello Fall" Tablescape. Since I am a HUGE fan of mexican food, I decided to create a sort of nacho bar theme. And the real reason...I have been dying to use my plates and bowls from Mexico!


All of the bright colors still remind me of summer, but the added texture with the napkin ring and place mat overlay bring in a bit of fall. The green place mat is actually a napkin draped over the side of the table. The little overlay was made on my Silhouette and I love how it adds another layered element. Can you believe that those navy and white striped napkins are actually paper napkins from target? Yep! The sunflowers also say summer, but the burnt red color says fall.

I am loving the mix of both seasons. How about you? Are you sad to see summer go or are you excited for the season ahead?

Don't forget to stop by and see what these lovely ladies have created.... Sarah, Mary & Brittany

Tuesday, November 26, 2013

Last Minute Thanksgiving Decor

If you are anything like me I am doing everything last minute these days! I will have to finish shopping for the Turkey and extras tomorrow (the day before) and will have to come up with some sort of centerpiece decorations for the middle of mom's table. If you saw my Thanksgiving Table a couple of weeks ago, you probably thought I was way ahead of the game. Err...not so much since we aren't even having Thanksgiving here this year! I just love putting table settings together. I wish I had time to entertain and switch up my table each week.


If you are running around trying to figure out what to do for your Thanksgiving Decor, I rummaged up a few quick options to inspire you all.


1. Using what you have. Left over pumpkins and/or vegetables to create a neat centerpiece without breaking the bank!


2. Easy DIY. Spray paint cheap chargers with chalkboard paint and add guest's names with chalk instead of using place cards. I did this with my Halloween Table Setting last year and it was cheap and easy! You could do this before Thanksgiving!


3. Use Textures. For a bit of an informal look grab a piece of burlap or fabric and drape it down the center of your table for texture and interest. (don't worry about sewing the edges...use a hot glue gun or leave it natural!)


4. Use Mother Nature! Go out and gather neat leaves, acorns, pine cones to create your centerpiece. In the picture below I used magnolia leaves and then added a simple lantern and candle on top. So easy and I didn't have to buy a thing!


5. You can't go wrong with Candles! Candles create a cozy atmosphere for guests. Load up your table and mantel with as many candles possible.


source unknown


Elle Decor


So tell me...are you hosting this year or have you been invited elsewhere? If you are hosting know that decorating doesn't have to be stressful. Just use a few of the tips from above and have fun with it! Cooking on the other hand....good luck! hehe


Monday, October 21, 2013

Sweet Velvet Pumpkins

A few weeks ago I saw an amazing giveaway for these sweet little pumpkins below. I usually at least "Try" to win. When I found out I was NOT the winner, I went to look them up to see how much they were to buy.

They are beautiful....BUT can you believe they are $98 for three! I mean they are probably made very well and out of diamonds real velvet, but I just couldn't pull the trigger. That is when my light bulb kicked on..." I could totally make these! How hard could it be!?"

My mother-in law was in town and she was totally on board to help me with a little DIY. Here are my quick instructions. You can also find some great tutorials around on pinterest.

Supplies:

Also: 2-3" Needle, hot glue gun & heavy thread

**Instead of velvet I used velveteen and velour to cut down on the cost!**
**Pumpkin stems were given to us at the farm after we bought a couple of our own.**


How to:

1. Since we were on vacation while doing this project we used plates and bowls that we found in the condo to be our templates. We traced them onto the fabric with a pen and used fabric scissors to cut the circle. 


Here are our measurements and what size plate/bowl made what size pumpkin:
- 15" plate/bowl = 6" pumpkin
-12.5" plate/bowl = 5" pumpkin
-10.5" plate/bowl = 4" pumpkin


2. Next we used a heavy weight thread and long needle to make a stitch around the top of the cut fabric. Using a long needle helped weave the fabric almost perfectly!
**We also doubled the thread to make sure it wouldn't break**


3. Once you have made your stitch around the top make sure you leave the thread long at both ends. This will be needed to tie the velvet tight. 


4. Fill and Stuff your pumpkin! We used some leftover doll beads and put at least a half of a cup in the bottom to give it some weight. You can use any type of beans like above. Then we stuffed the rest of the pumpkin with polyfill stuffing to give it the shape we wanted. (we added more for a plump pumpkin and less for a squatty pumpkin.)


5. Here is where those long strings come in handy! Pull the thread tight and give it a few knots to hold the top in place.


6. Cut the extra thread and work your hands around the pumpkin to make it look the way you want.


7. Using your hot glue gun, glue the stem to the top of your pumpkin holding the stem for 1-2 minutes for adhesion. 

8. Enjoy the fruits of your labor!! AKA...ooh and ahh and show everyone what you made!


These were so quick and easy to make! We made so many within just an hour once we got rolling! They are lined down my dining room table for now. Every time I walk by them they just make me smile.


What DIYs have you been tackling for fall?


Linked up: LizMarieBlog

Related Posts Plugin for WordPress, Blogger...

Total Pageviews