
Showing posts with label Restoration Hardware. Show all posts

Thursday, July 31, 2014

Client Project Update {The power of paint}

Hi All! Hope you are having a great week. I am so ready for Friday...how about you?

I have been working with a few clients both local and via e-design and wanted to share with you all about what I am doing on these projects. I have enjoyed working and creating spaces I know my clients are going to enjoy for a long time.

Today I am giving you just a little peek into one of my local client projects. Donna contacted me about a month ago for a paint consultation for both her front living room and large family room. She wanted to brighten up both spaces and create a more relax feel.{sorry for the quality of my phone pictures! That's all I had with me}

Family Room Before:


Living Room Before:


As you can see both rooms have fantastic features and pieces. They both just needed a little paint and some accessorizing. That's the fun part!

My clients really fell in love with Restoration Hardware's line of paint colors for the family room. I originally recommended either Glacier or Silver Sage. I thought both colors were great neutrals but would give a bit of a relaxed feel to the space and allow them to choose punches of color in accessories. I left my samples with the family to decide. They called and decided that they wanted more of an impact and to really make a statement on the walls.


They decided on Light Silver Sage. I am so glad they did. It really feels like a soothing room that you want to escape to. They have large windows that look out onto their hardscape and pool area. This blue/green/gray really reflects some of the colors just outside their windows. I also love how the color changes throughout the day. It really is gorgeous in person!


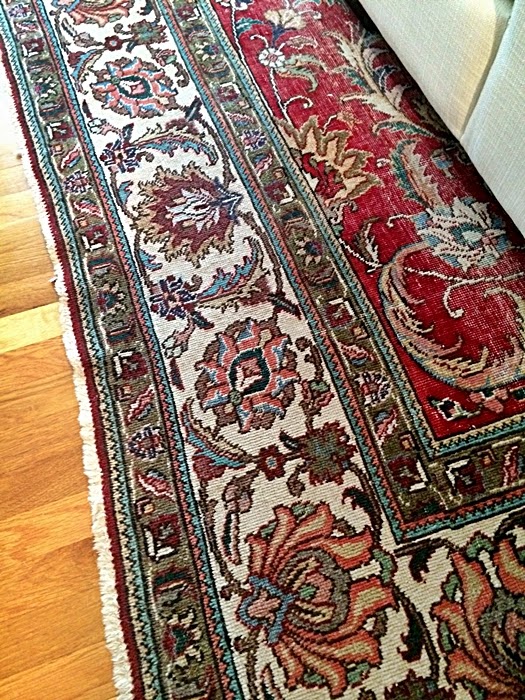
The color on the wall really pulls out the colors in the rug as well. This room is starting to come to life!


Now onto the front living room. I shared the picture below with my clients and they automatically fell in love with the idea of adding a pop of color to the built-ins rather than painting all of the walls.


The paint on the back of the shelves is Wythe Blue by Benjamin Moore. When I shared the sample with them, they thought it might be a bit too dark for the space. So they decided on the color above Wythe Blue called Chesapeake Blue.


Boy did that color make an impact in that small space!


Now we are on to finding some lamps, pillows, throws, artwork and of course tackling the built-ins with some stylish accessories. Stay Tuned! Can't wait to share more progress.

And I couldn't leave you without a couple Before & Progress Pictures...


Thursday, October 24, 2013

Bold Stripes In Our Entryway

I am so excited to show you this amazing DIY today! It was a lot of work and my calves were sure barking the day after, but SO worth it.


If you remember our Hallway use to look like THIS. It wasn't bad, but needed a little statement. I was so pleased with how the stripes came out that I needed to show you just a few tips on what worked for me. I was very intimidated on tackling stripes until I saw this tutorial and these tips! So helpful!

First, I started with a clean slate. Took all of the artwork and nails out of the walls. I repainted the walls with the base coat in Valspar's Bonsai. It is hard to tell in these pictures, but Bonsai is a wonderful neutral with gray and green undertones. Love the moodiness of it!
Next, I measured from the ceiling to the top of the wainscoting. I then divided that measurement by 7. Why 7? I decided I wanted an odd number of stripes somewhere around 10-12 inches wide. Not too wide, not too narrow. 


I then started measuring from the ceiling down every 10 1/4". I made little tick marks all the way across the wall and then used a level to draw my straight line while matching those tick marks.


(This was the tedious part ya'll! Up and Down my ladder a ba-zillion times!)

Then was the semi-fun part....Adding the Frog Tape! A tip on this also...it would be great to have two people adding the tape to the wall. One person holding the tape, the other actually lining it up and placing it right under the penciled line. I did this by myself and it just took forever dispensing the tape and adding it on the wall. Also, be sure that you don't tear the tape until the end of that stripe! Use a really long piece from start to finish!


Two things about the above pictures: 1) Those small pieces of tape are to warn me not to paint there! 2) You will notice that the stripes look uneven here. One larger than the other. It looks this way because I placed the tape inside the stripe that wasn't going to be painted. The tape is now inside the line I drew. Does this make sense? If you don't do it this way, then you will end up with uneven lines in the end. 


Next trick I learned...before you start with your darker paint, use your original wall color to edge the painters tape to seal in the color. Even though Frog Tape is suppose to be amazing with stripes, the darker paint can still bleed under the tape and then you will not have a clean straight line when you pull off the tape. It might take a bit longer for this step...but So worth it when you pull that tape off and squeal with delight!!


I then edged the darker stripes with a brush and then rolled the insides. I chose Slate by Restoration Hardware for the dark stripe and had it matched at Sherwin Williams. 


I am pretty excited to show you the end product! Sorry (not sorry) for the overload of pictures!!!


Next on the list..getting rid of the boob lights!


And of course I couldn't possibly say good-bye for the day until I gave you a little before, before and after!


Tell me...have you ever painted stripes? Any tips or tricks you learned?

Have a fabulous day!


Monday, August 12, 2013

Picking Vanity Colors using {Small Wall}

While I was at Haven Conference I met Jenna from SAS Interiors. She is one talented blogger as well as interior designer/decorator. Jenna was able to come to the conference with the help of some fantastic sponsors. One sponsor that she was promoting was Small Wall. If you haven't used these before, then you will need some after I get done with this post! She was nice enough to give me a sample to try out!


How many times have you picked the wrong color for your room? Ummm.. I am right there with ya! These 12"x12" adhesive backed sample boards will really help with your color decisions. They are the perfect size where you can really sample the color and they have a sticky back that won't ruin your walls.


Here are the two samples that I am trying out for our Master Bath Vanity. You can see how I hung them right on the wall and the wood vanity. I could use these many more times without the adhesive wearing down.


Jenna told me you can paint over these samples and use them many times without having to get new ones.


This color is more true to the eye in the previous two pictures.


Aren't they great!? Now you don't have to have millions of paint samples on your walls. (You can thank me later...and your welcome!)

What color are you leaning toward for my vanity? Remember my inspiration picture HERE?

Any painting going on at your house?


Monday, July 29, 2013

Master Bathroom Before & Design Plan

Hope all you lovelies had a great weekend! My sweet niece turned one year old this past week and we had a wonderful little party for her. We also got to accomplish some small organizing projects around this joint!

Some of you may remember my New Years Resolutions that I made for our home in January. I was looking back on those Goals and realized I need to kick myself into high gear if I am going to finish all of them in 2013. I have gotten a lot done in the Hubs Office. I started the organization of our Master Closet with these hooks and pinspiration board and our Master bathroom everyday supplies were organized here. However, I realized that I haven't even touched updating the Master bathroom!

So..I am thinking that if I say all of my design plans on here in front of all of you, that I will start getting motivated to tackle the Master Bath! {A girl can wish you know!}

Let's talk about a Design Plan People...
Just to let you know, we don't want to spend a fortune in here because we are only planning on staying in our home for about 3 more years. We want to update it and make it a space we enjoy to be in, but don't want to spend money on granite counter tops, tile floors, etc. We are just looking for a face-lift of sorts. 


When you walk straight into the bathroom their is a stand up shower with a glass door. I am not going to change anything there, but just to the left of the shower is this soaking tub. We use this a lot in the fall and winter and I am thinking that a Roman shade mounted high above the blocked window would add a little excitement like the picture below:


To the left of the tub is the toilet area. Wouldn't it be amazing to do some custom shelving above the half wall like this:


I am also thinking some floating shelves above the toilet and white subway tile around the soaking tub like this:


Our double vanity is on the opposite side of the bathroom from the tub and toilet. The faucets and sinks are in great shape, so I want to make sure we keep them and save a little money. 


However, I am thinking that I want to change up the vanity with some paint and new hardware. The vanity itself has taken a little bit of a beating and the laminate wood is starting to chip.


I am picturing a darker vanity like below with either Lucite or glass hardware:


The floors in the bathroom are just vinyl, but they are in great shape and this would be one area we could save money on. We are probably going to keep our home and rent it out when we move in a few years, so if we keep the vinyl we would have a lot less maintenance in the end. 


Last, but certainly not least is the lighting and the mirror. I am a little stuck on what to do with these fantastic bell lights (do you hear the sarcasm?) I am still trying to find a better option for this space. These are definitely cheap builder grade lights. I am thinking we could salvage these and use them in one of our flip homes!

Also, I really want to frame out that mirror and create a more custom look. I am visioning a black glossy frame that would really pop!

Colors...well I want to paint the walls white and the vanity a dark gray or deep blue/black.

I am tossing a few paint choices around:

Slate by Restoration Hardware
Urban Bronze by Sherwin Williams
Iron Ore by Sherwin  Williams
Dovetail by Sherwin Williams


So what do you all think? Any advice or ideas you might have for me to consider in my bathroom?

Here's to a fantastic new week!


Monday, August 27, 2012

West Elm is Now Open!!

Can you hear the excitement in my voice!! I have been waiting for a year for West Elm to finally open in the Raleigh/Durham area. Now I won't have to drive all the way to Charlotte or D.C for a trip to West Elm. YESS!!


My mother-in law was in town this past week and I took a day off of work to go shopping! There were some fabulous items out for the fall!

This is a great DIY idea for organizing your utensils in the kitchen. Burlap and Chalk board labels!


Love the contrast in textures between the white ceramic vases and stick sunburst mirror.


West Elm's displays are always fabulous! Such a mix of colors and textures!


Mercury Glass and faux magnolias...gorgeous!


Now these babies need to come home with me! I love these convex mirrors. Might have to go back and grab a few!


I am also in love with these side chairs. I really want to get two end chairs for our dining table and these beauties have such fabulous curved lines. Might just have to save up!


We also stopped into Restoration Hardware. Remember my post on Double Chandeliers?

Well...check these babies out:


Restoration Hardware sure has changed its vibe over the past couple of years. It has so many unique pieces that you can't find anywhere else like this vintage looking trunk coffee table:


You would seriously need a very large space for that! It looks smaller than it really is! You could fit two bodies inside. (Didn't mean to sound creepy, but it's true! :)


I think this is a fabulous DIY idea! Collect some sheet music of a favorite song, place it on a mat color of your choice and then frame it! Might have to do this someday!


Some great finds out there people!....and so many deals right now!
Happy Monday all!


Related Posts Plugin for WordPress, Blogger...

Total Pageviews